树莓派在许多使用场景下并不需要接一台专用显示器,如需要查看树莓派上的一些信息可以通过手机、电脑登录到树莓派上操作,但总归不够便利。
下面介绍两款 OLED 小屏(均为 SSD1306 芯片驱动)可以直接插到树莓派 GPIO 上,配有 Python 源码让树莓派玩家可以轻松用它来显示任何图文或动画内容。
1、Pi OLED 128×32 OLED 屏幕扩展(I2C)
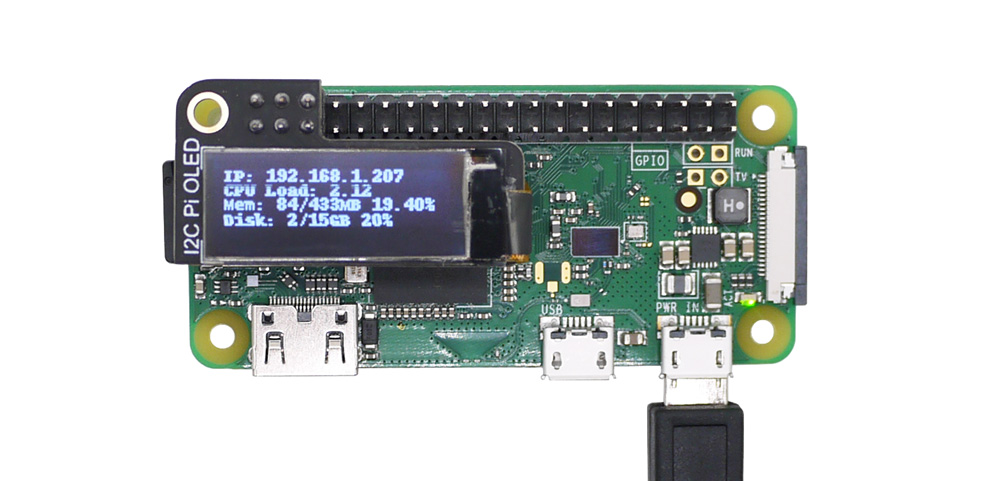
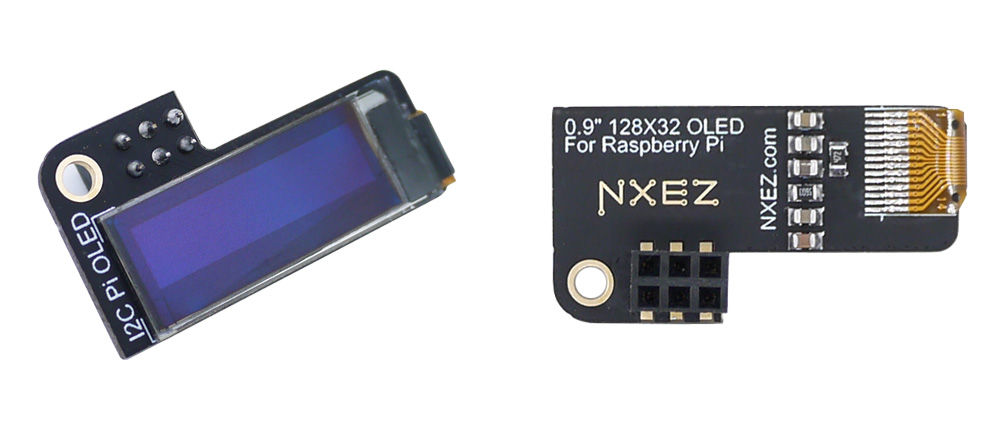
Pi OLED 配备 0.9 英寸迷你单色屏,128×32 分辨率,白光像素点。拥有极高的对比度,显示清晰极易辨识。OLED 仅使用树莓派的 I2C 和电源引脚,无需独立供电,即插即用。(查看详情,购买链接)
2、“复古小电视” OLED 屏
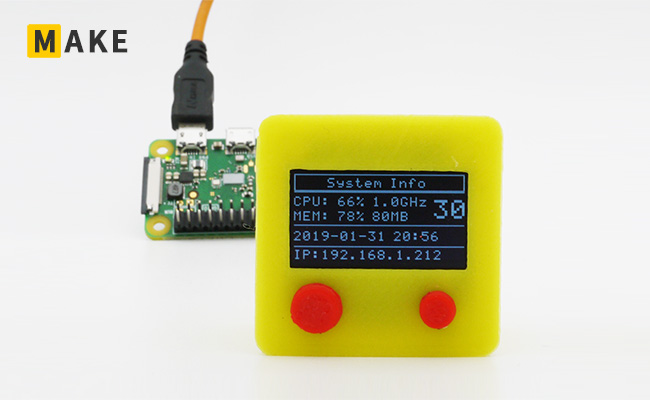
带有 3D 打印外壳的 OLED 小屏,分辨率 128×64。通过 I2C 连接到树莓派,无需独立供电。(购买链接)
一、启用树莓派的I2C功能
sudo apt-get install -y python-smbus
sudo apt-get install -y i2c-tools
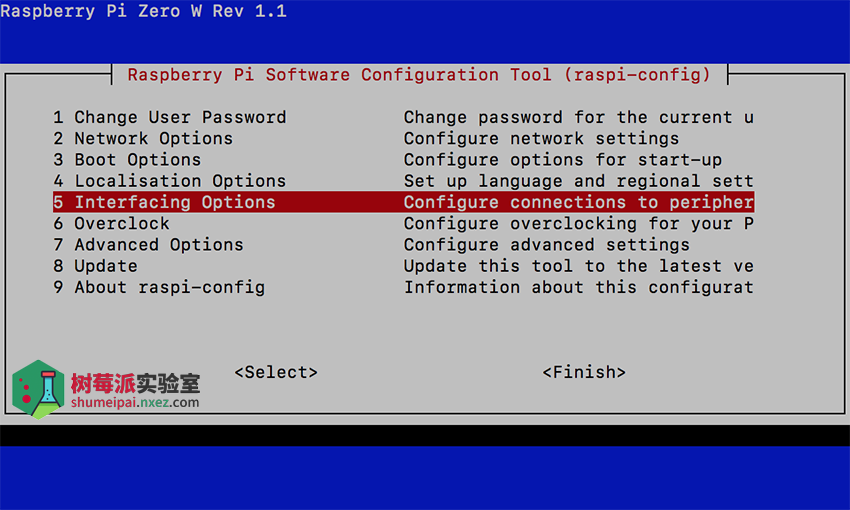
sudo raspi-config
按照下面的步骤设置开启 I2C 功能。
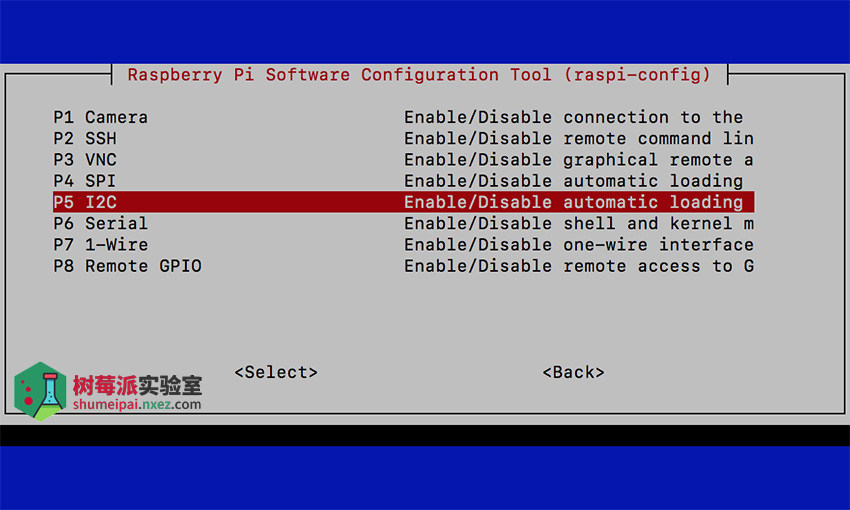
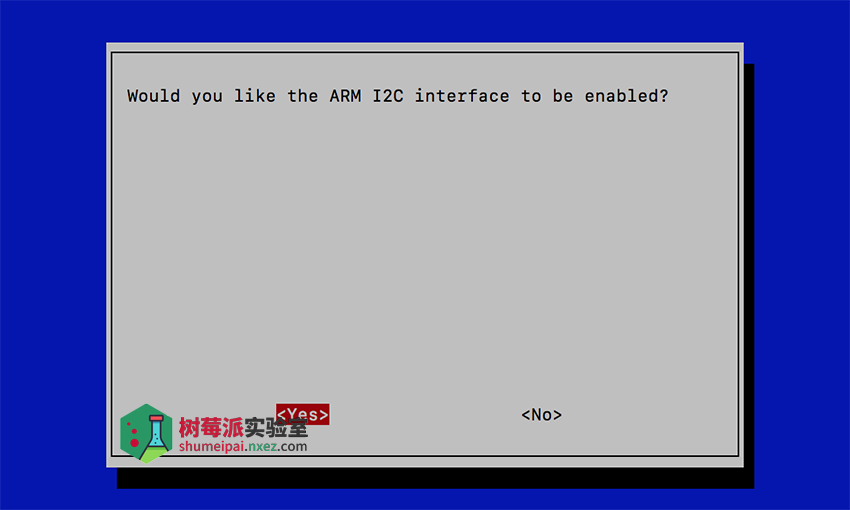
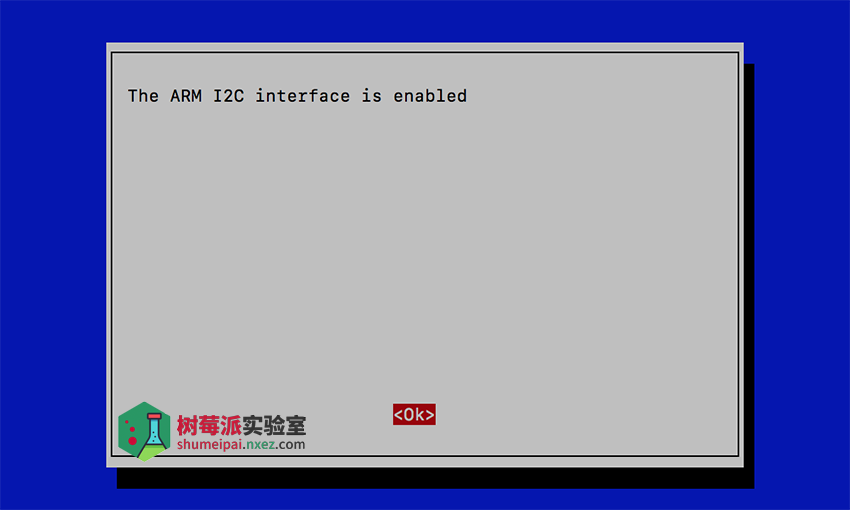
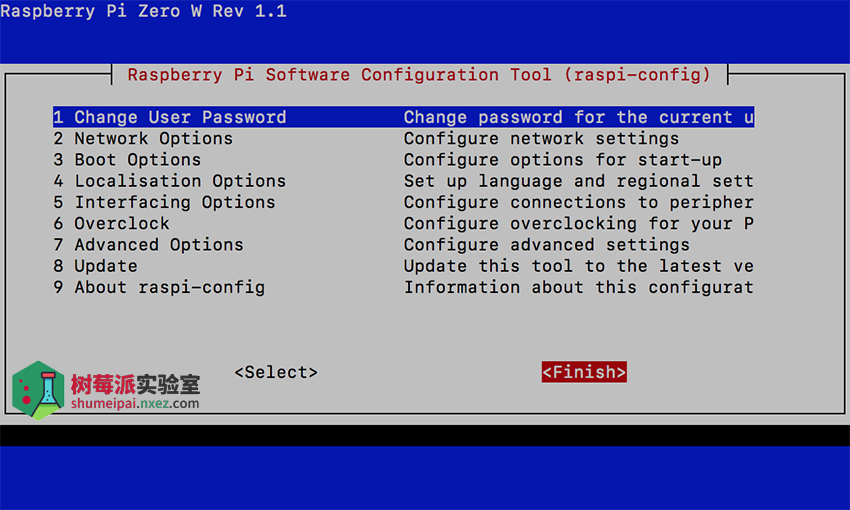
重启树莓派。
sudo reboot
二、安装 Adafruit-SSD1306 库
Adafruit-SSD1306 是基于 Python 的 OLED 库,可以用于 128×64、128×32 像素 SSD1306 芯片控制的屏幕。
使用下面的命令安装。
sudo python -m pip install --upgrade pip setuptools wheel

注意,如果这一步出现错误提示“TypeError: unsupported operand type(s) for -=: ‘Retry’ and ‘int’”,可以尝试卸载后重新安装 pip 来解决。
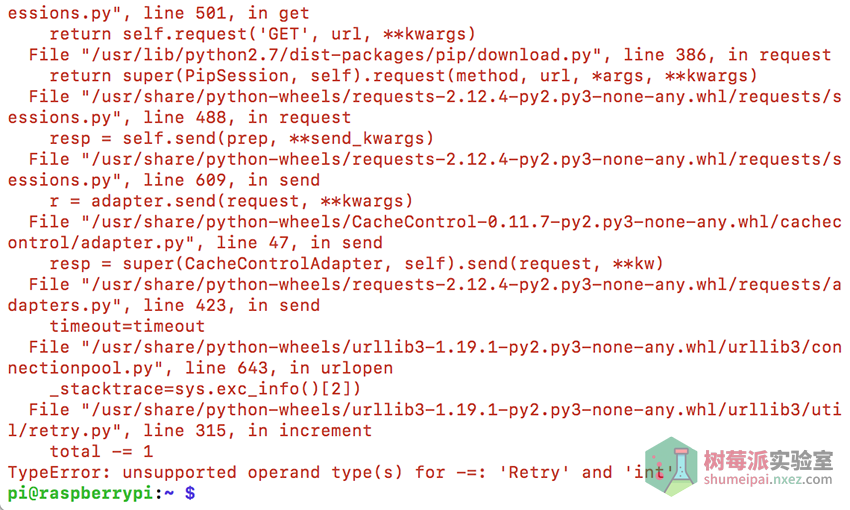
sudo apt-get remove python-pip python3-pip
sudo apt-get install python-pip python3-pip
安装 PIL 库,有一些图片处理的程序会用到这个。
sudo apt-get install python-pil python3-pil
使用 pip 安装 Adafruit-SSD1306 库。
sudo pip3 install Adafruit_GPIO
sudo pip3 install Adafruit_SSD1306
sudo pip3 install Adafruit_BBIO
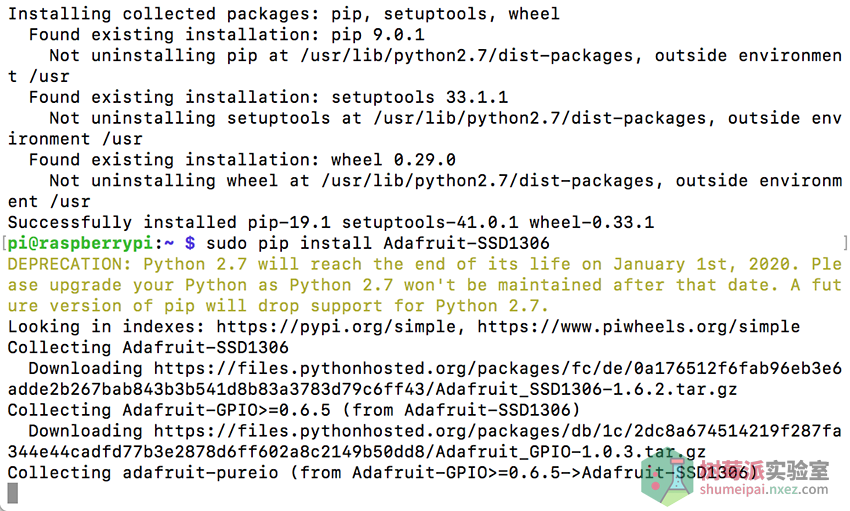
再下载一份包含代码示例的库后面要用。
cd ~
git clone https://github.com/adafruit/Adafruit_Python_SSD1306.git

这里顺便提一下,如果上面的 pip 安装 Adafruit-SSD1306 库遇到网络问题,那么也可以在下载完这份代码之后运行下面的命令安装(可选):
cd Adafruit_Python_SSD1306
sudo python setup.py install
进到示例目录,可以看到有一些已经准备好了的代码,后面将屏幕接好之后可以直接运行看效果。
cd ~/Adafruit_Python_SSD1306/examples/

三、连接屏幕
对于 Pi OLED 屏幕扩展,直接安插在 GPIO 如图所示位置(物理引脚编号1-6号)。

对于“小电视”屏幕,根据屏幕 PCB 上引脚的功能标注接到树莓派上对应的 GPIO 上即可。
屏幕 GND 接树莓派 GND
屏幕 VCC 接树莓派 3V3
屏幕 SDA 接树莓派 SDA
屏幕 SCL 接树莓派 SCL
注意一定不要接反 VCC 和 GND,否则会烧坏屏幕。
下面通过命令检测是否识别到 I2C 设备。
sudo i2cdetect -y 1

将显示已连接设备的 I2C 地址,不同的屏幕地址可能会不一样,通过这个步骤可以确认一下。
注意,如果你正在使用的是初代树莓派(256MB的树莓派1代B),那么需要用这个命令:
sudo i2cdetect -y 0
四、编程和运行
为了快速上手,我们可以直接使用示例代码。其中有一个文件名为 stats.py 的程序,用来显示树莓派的 IP、CPU Load、内存和磁盘使用情况。先拿这个来试试看。
将之前下载的源码复制到用户目录,用编辑器打开。
cd ~
sudo cp ~/Adafruit_Python_SSD1306/examples/stats.py ~/
sudo nano stats.py
可以看到这份示例已经包含了多种屏幕参数的初始化方法。
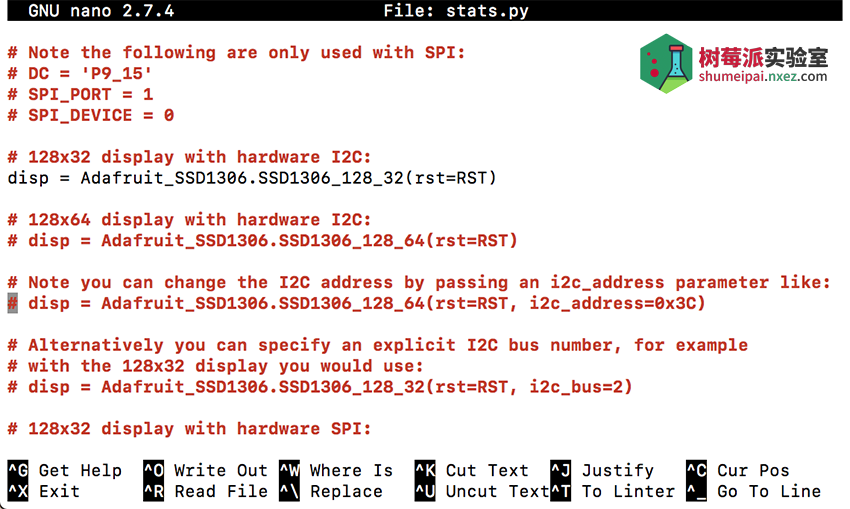
# 128x32 display with hardware I2C:
disp = Adafruit_SSD1306.SSD1306_128_32(rst=RST)

# 128x64 display with hardware I2C:
# disp = Adafruit_SSD1306.SSD1306_128_64(rst=RST)

# Note you can change the I2C address by passing an i2c_address parameter like:
# disp = Adafruit_SSD1306.SSD1306_128_64(rst=RST, i2c_address=0x3C)
你可以根据实际所用的屏幕来修改这些参数,例如 SSD1306_128_32 代表 128×32 分辨率屏幕的初始化方法,适用于本篇介绍的 Pi OLED 128×32 OLED 屏幕扩展,SSD1306_128_64 适用于“复古小电视” OLED 屏。i2c_address 用于配置屏幕的地址,默认为 0x3C。
运行示例代码,可看到运行效果。
sudo python3 stats.py

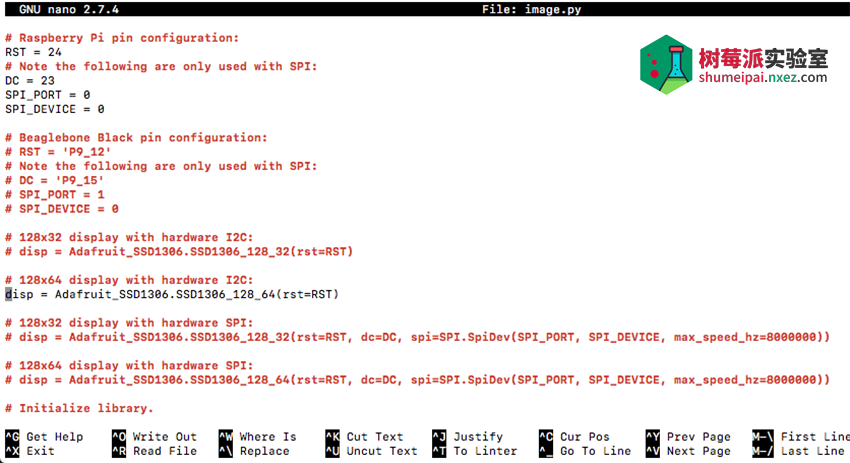
同样的方法再试试 image.py 这个示例效果如下。
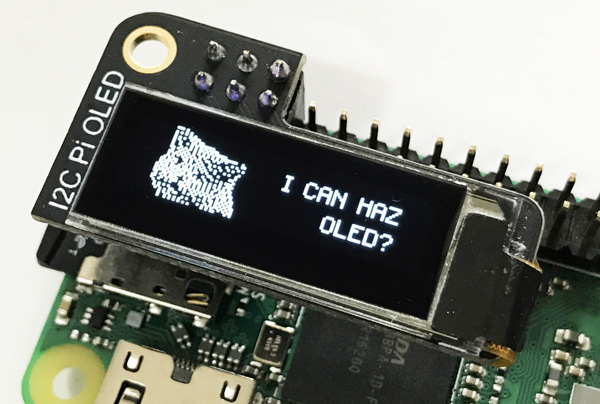
通过修改 image.py 中的初始化参数,调整为 128×64 分辨率之后。
disp = Adafruit_SSD1306.SSD1306_128_64(rst=RST)
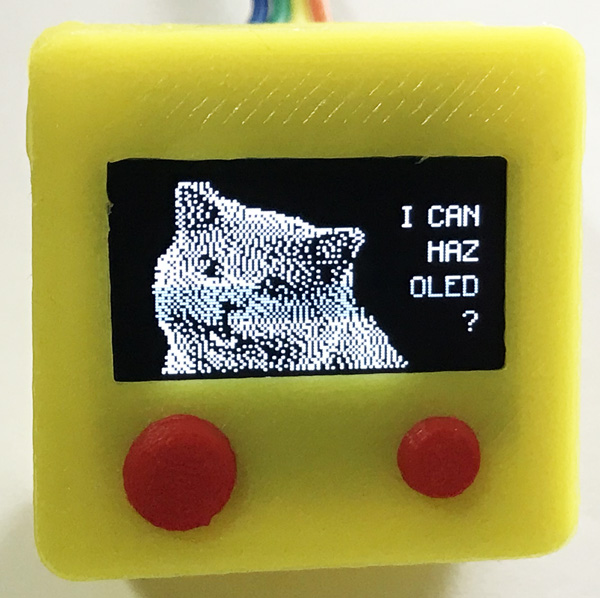
屏幕上的图片、形状、文本和字体都是由 PIL(Python Imaging Library)的模块 Image, ImageDraw, and ImageFont 来实现的。如有兴趣可以试试其他代码示例,并学习自己设计图文来显示。
五、设置开机运行
为了让 stats.py 能够开机自动运行,我们可以做下面的配置,这样我们就可以不用通过工具或路由器去查找树莓派的 IP 地址等信息了。
修改 /etc/rc.local 文件。
sudo nano /etc/rc.local
在 exit 0 前面增加一行:
sudo python3 /home/pi/stats.py &

编辑好之后按下 Ctrl+O 保存,再按下 Ctrl+X 退出。重启树莓派验证一下是否生效吧!
sudo reboot
六、提高显示速率(可选,不推荐)
为了更好的显示性能,例如显示动画时如对帧率有要求,可以通过修改下面的参数将 I2C 频率从默认的 100KHz 或 400KHz 提升到 1MHz。
sudo nano /boot/config.txt
在文件末添加一行:
dtparam=i2c_baudrate=1000000
– 全文完 –


要是这些给高中生学,合适吗?能不能接受??
可以的,介绍一下基本的 Linux 操作就可以更好的理解了。
显示模块用的和文章所示一毛一样(128×32)
执行 python3 stats.py(文件没有修改)
报错 RuntimeError: Could not determine platform.
怎么破?
sudo cd ~/Adafruit_Python_SSD1306/examples/
python3 运行显示前多一个“b‘”怎么回事
draw.text((x, top), “IP: ” + str(IP,’utf-8′), font=font, fill=255)
draw.text((x, top+8), str(CPU,’utf-8′) + ” ” + str(temp,’utf-8′) , font=font, fill=255)
draw.text((x, top+16), str(MemUsage,’utf-8′), font=font, fill=255)
draw.text((x, top+25), str(Disk,’utf-8′), font=font, fill=255)
你的显示b的问题解决了吗?我按照楼下(amigo)的方法试了,不行。报错
报错内容是:File “/home/pi/Adafruit_Python_SSD1306/examples/stats.py”, line 122
draw.text((x, top), “IP: ” + str(IP,’utf-8′), font=font, fill=255)
^
IndentationError: unindent does not match any outer indentation level
因为获取到了这些信息是Bytes格式的,而Python中要用str,需要给他转换下,加上’utf-8’就可以正常显示了。
#测试有效,解码utf8字节为字符串
draw.text((x, top), “IP: ” + str(IP.decode(‘utf-8’)), font=font, fill=255)
draw.text((x, top+8), str(CPU.decode(‘utf-8’)), font=font, fill=255)
draw.text((x, top+16), str(MemUsage.decode(‘utf-8’)), font=font, fill=255)
draw.text((x, top+25), str(Disk.decode(‘utf-8’)), font=font, fill=255)
树莓派3b的27.28接口也显示 scl,sda,可以用来连接i2c设备吗
我的引脚4,6接风扇用掉了怎么办
只能把风扇焊接到这个板子上面了
Traceback (most recent call last):
File “stats.py”, line 47, in
disp = Adafruit_SSD1306.SSD1306_128_32(rst=RST)
File “/usr/local/lib/python2.7/dist-packages/Adafruit_SSD1306/SSD1306.py”, line 288, in __init__
gpio, spi, i2c_bus, i2c_address, i2c)
File “/usr/local/lib/python2.7/dist-packages/Adafruit_SSD1306/SSD1306.py”, line 85, in __init__
self._gpio = GPIO.get_platform_gpio()
File “/usr/local/lib/python2.7/dist-packages/Adafruit_GPIO/GPIO.py”, line 420, in get_platform_gpio
import Adafruit_BBIO.GPIO
ImportError: No module named Adafruit_BBIO.GPIO
GPIO的ada库也安装了怎么办
sudo pip3 install Adafruit_GPIO
sudo pip3 install Adafruit_SSD1306
sudo pip3 install Adafruit_BBIO
sudo python3 stats.py
Traceback (most recent call last):
File “stats.py”, line 71, in
disp.begin()
File “/usr/local/lib/python3.7/dist-packages/Adafruit_SSD1306/SSD1306.py”, line 148, in begin
self._initialize()
File “/usr/local/lib/python3.7/dist-packages/Adafruit_SSD1306/SSD1306.py”, line 292, in _initialize
self.command(SSD1306_DISPLAYOFF) # 0xAE
File “/usr/local/lib/python3.7/dist-packages/Adafruit_SSD1306/SSD1306.py”, line 129, in command
self._i2c.write8(control, c)
File “/usr/local/lib/python3.7/dist-packages/Adafruit_GPIO/I2C.py”, line 114, in write8
self._bus.write_byte_data(self._address, register, value)
File “/usr/local/lib/python3.7/dist-packages/Adafruit_PureIO/smbus.py”, line 322, in write_byte_data
self._device.write(data)
OSError: [Errno 121] Remote I/O error
Traceback (most recent call last):
File “stats.py”, line 50, in
disp = Adafruit_SSD1306.SSD1306_128_64(rst=RST)
File “/usr/local/lib/python3.7/dist-packages/Adafruit_SSD1306-1.6.2-py3.7.egg/Adafruit_SSD1306/SSD1306.py”, line 243, in __init__
File “/usr/local/lib/python3.7/dist-packages/Adafruit_SSD1306-1.6.2-py3.7.egg/Adafruit_SSD1306/SSD1306.py”, line 85, in __init__
File “/usr/local/lib/python3.7/dist-packages/Adafruit_GPIO-1.0.3-py3.7.egg/Adafruit_GPIO/GPIO.py”, line 426, in get_platform_gpio
RuntimeError: Could not determine platform.
这个是什么问题呀
运行sudo apt-get install python-pil python3-pil
报错错误:1 http://raspbian.raspberrypi.org/raspbian buster/main armhf python-pil armhf 5.4.1-2+deb10u1
404 Not Found [IP: 93.93.128.193 80]
错误:2 http://raspbian.raspberrypi.org/raspbian buster/main armhf python3-pil.imagetk armhf 5.4.1-2+deb10u1
404 Not Found [IP: 93.93.128.193 80]
错误:3 http://raspbian.raspberrypi.org/raspbian buster/main armhf python3-pil armhf 5.4.1-2+deb10u1
404 Not Found [IP: 93.93.128.193 80]
E: 无法下载 http://raspbian.raspberrypi.org/raspbian/pool/main/p/pillow/python-pil_5.4.1-2+deb10u1_armhf.deb 404 Not Found [IP: 93.93.128.193 80]
E: 无法下载 http://raspbian.raspberrypi.org/raspbian/pool/main/p/pillow/python3-pil.imagetk_5.4.1-2+deb10u1_armhf.deb 404 Not Found [IP: 93.93.128.193 80]
E: 无法下载 http://raspbian.raspberrypi.org/raspbian/pool/main/p/pillow/python3-pil_5.4.1-2+deb10u1_armhf.deb 404 Not Found [IP: 93.93.128.193 80]
E: 有几个软件包无法下载,要不运行 apt-get update 或者加上 –fix-missing 的选项再试试?
运行sudo python3 image.py
报错python3: can’t open file ‘image.py’: [Errno 2] No such file or directory
但是示例库examples里面有image.py文件