
RaspAP 是一个可以将树莓派轻松部署成无线 AP(Access Point)的软件方案,具有一套响应式的 WebUI 来控制 WiFi,用起来和家用路由器一样方便。RaspAP 可以运行在 Raspbian 上,只需要先给树莓派安装好 Raspbian 系统,再通过快速安装脚本就可以轻松完成 RaspAP 的安装和配置。
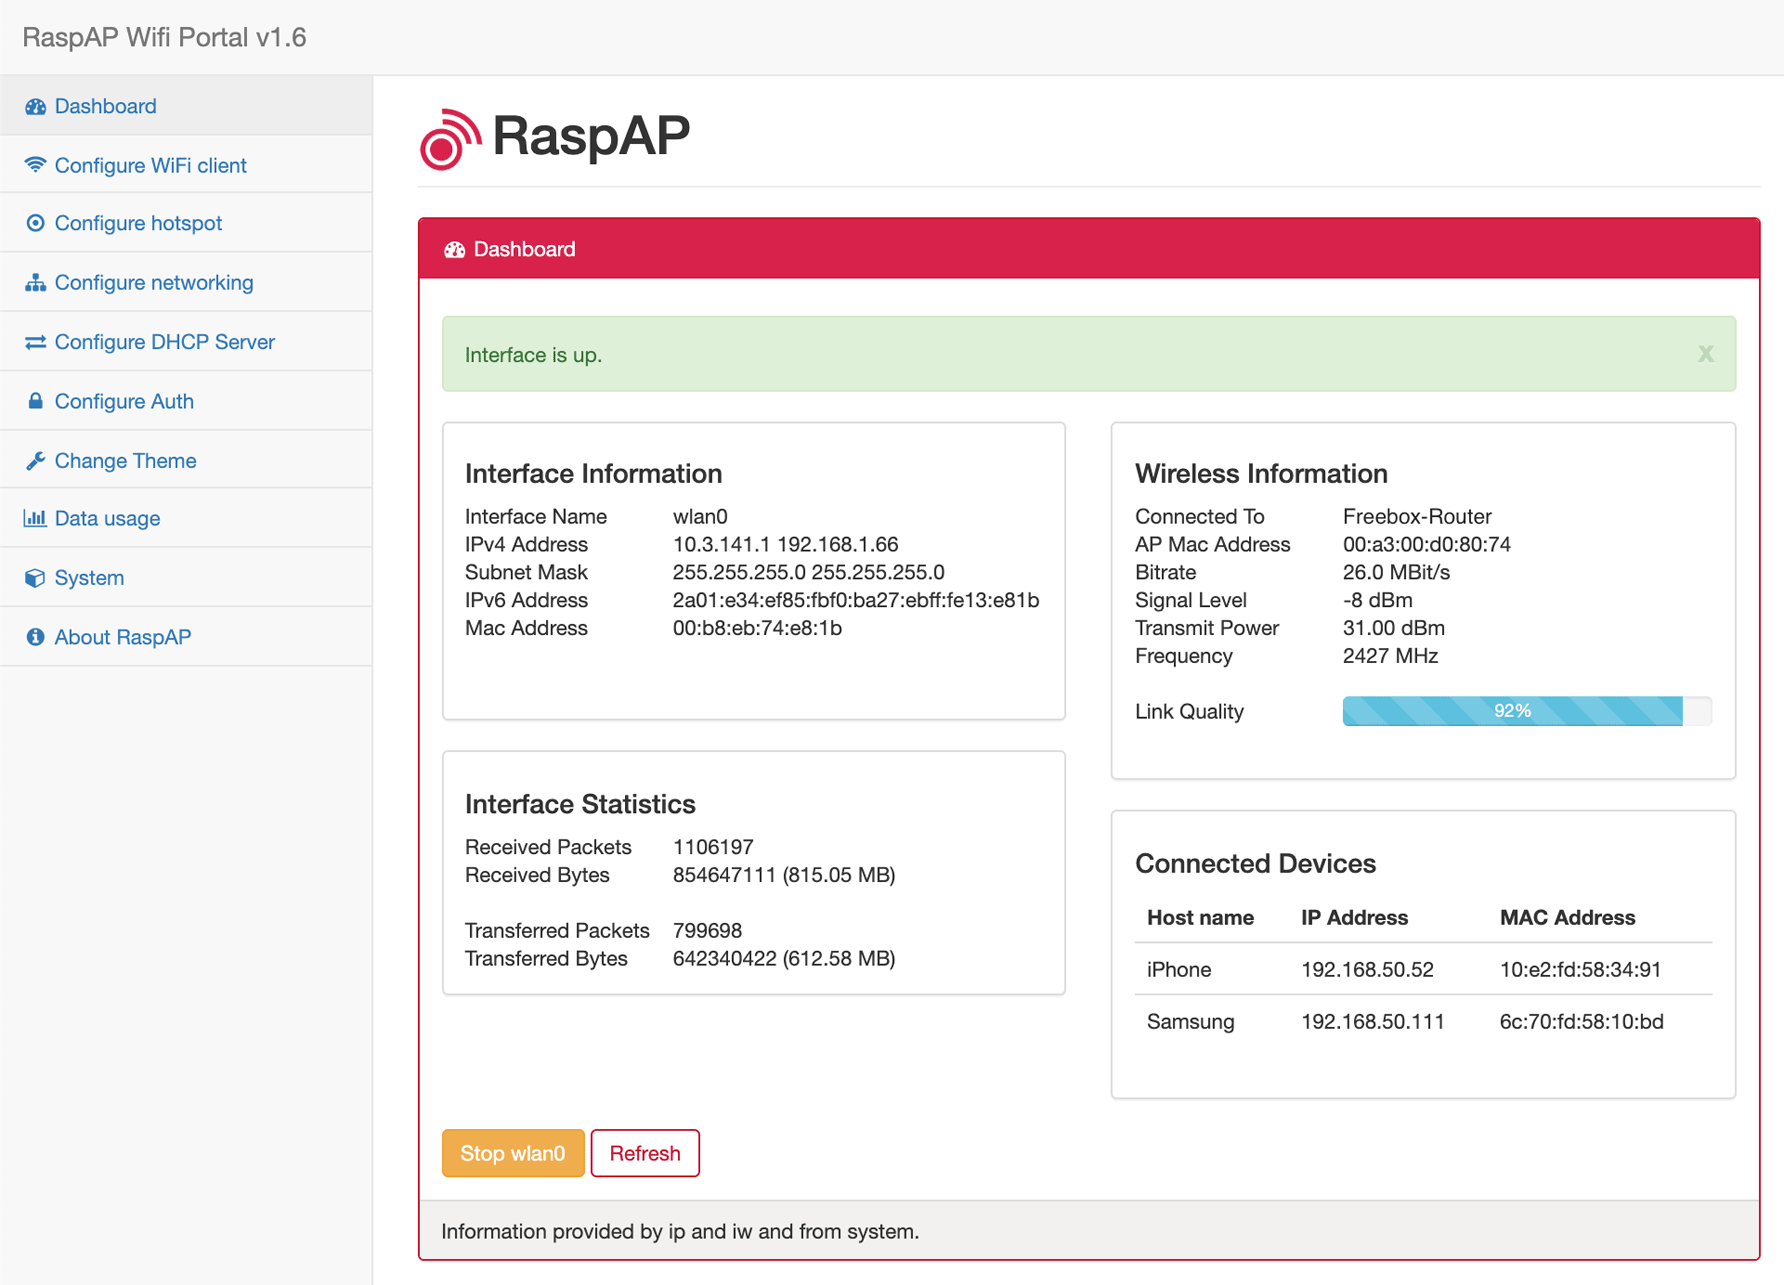
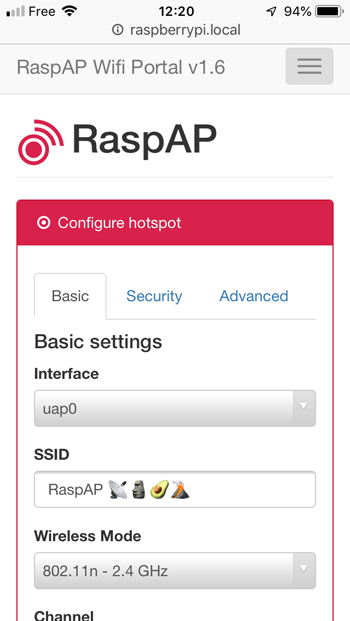
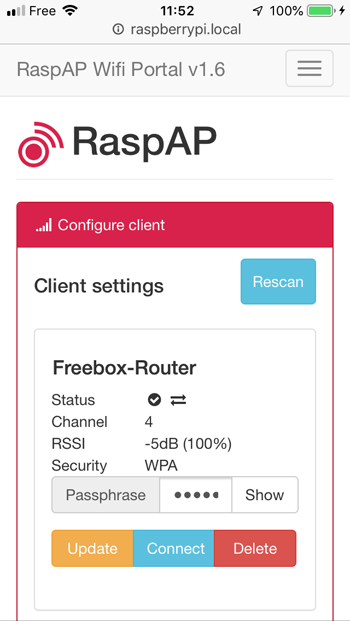
下面我们介绍一下 RaspAP 的安装配置方法。
准备工作
全新安装 Raspbian,建议使用最新的版本。
../../../2013/09/07/how-to-install-and-activate-raspberry-pi.html
建议更新 Raspbian,包括核心和固件,然后重启系统:
sudo apt-get update

sudo apt-get dist-upgrade

sudo reboot
运行 sudo raspi-config 命令,在设置 Localisation Options 菜单中设置 WiFi 地区。
如果你使用的是没有集成无线网卡的老版本树莓派,则需要自行准备一个 USB 的无线网卡。
完成上面这些准备工作之后,就可以开始下面的步骤进行快速安装了。
快速安装
下面提供了一个安装脚本,只需要一行命令就可以完成 RaspAP 的快速安装:
wget -q https://git.io/voEUQ -O /tmp/raspap && bash /tmp/raspap
安装程序会帮你完成所有需要手动安装的步骤(见下文)。
安装完成之后重启树莓派,无线网卡默认会被配置为热点:
IP 地址: 10.3.141.1
登录用户名: admin
登录密码: secret
DHCP 范围: 10.3.141.50 至 10.3.141.255
SSID: raspi-webgui
WiFi 密码: ChangeMe
AP – WiFi 客户端模式
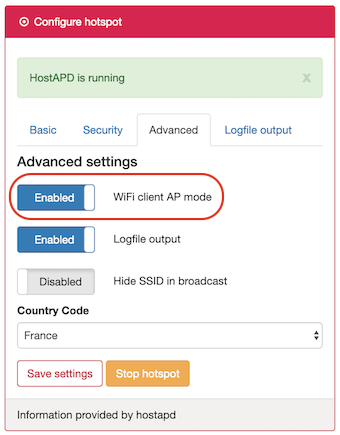
RaspAP 允许你将树莓派通过有线网卡接入网络的同时,利用无线网卡去开启 AP 模式,实现对网络的共享。在 Configure hotspot 的 Advanced 标签栏中启用 AP,然后保存设置来启动热点,无须重启树莓派。
手动安装
尽管上面已经提供了自动化的安装脚本,但是为了便于理解,下面将介绍手动安装 RaspAP 的方法。
这些步骤适用于最新的 Raspbian Buster 版本,如果你用更早的 Raspbian 版本,则需要先安装好 git、lighttpd、php7、hostapd 和 dnsmasq。
sudo apt-get install git lighttpd php7.1-cgi hostapd dnsmasq vnstat
注意:在 Raspbian Stretch 中,需要用 php7.0-cgi 替换以上命令中的 php7.1-cgi;而对于 Raspbian Jessie 或更早的版本,需要用 php5-cgi 替换以上命令中的 php7.1-cgi。启用 lighttpd 的 PHP 并重启 lighttpd 使设置生效:
sudo lighttpd-enable-mod fastcgi-php

sudo service lighttpd restart
为 www-data 用户添加对 sudoers 文件的访问权限。使用 nano 编辑器将下面的内容添加到 /etc/sudoers 文件的末尾:
www-data ALL=(ALL) NOPASSWD:/sbin/ifdown

www-data ALL=(ALL) NOPASSWD:/sbin/ifup

www-data ALL=(ALL) NOPASSWD:/bin/cat /etc/wpa_supplicant/wpa_supplicant.conf

www-data ALL=(ALL) NOPASSWD:/bin/cat /etc/wpa_supplicant/wpa_supplicant-wlan[0-9].conf

www-data ALL=(ALL) NOPASSWD:/bin/cp /tmp/wifidata /etc/wpa_supplicant/wpa_supplicant.conf

www-data ALL=(ALL) NOPASSWD:/bin/cp /tmp/wifidata /etc/wpa_supplicant/wpa_supplicant-wlan[0-9].conf

www-data ALL=(ALL) NOPASSWD:/sbin/wpa_cli -i wlan[0-9] scan_results

www-data ALL=(ALL) NOPASSWD:/sbin/wpa_cli -i wlan[0-9] scan

www-data ALL=(ALL) NOPASSWD:/sbin/wpa_cli -i wlan[0-9] reconfigure

www-data ALL=(ALL) NOPASSWD:/bin/cp /tmp/hostapddata /etc/hostapd/hostapd.conf

www-data ALL=(ALL) NOPASSWD:/etc/init.d/hostapd start

www-data ALL=(ALL) NOPASSWD:/etc/init.d/hostapd stop

www-data ALL=(ALL) NOPASSWD:/etc/init.d/dnsmasq start

www-data ALL=(ALL) NOPASSWD:/etc/init.d/dnsmasq stop

www-data ALL=(ALL) NOPASSWD:/bin/cp /tmp/dhcpddata /etc/dnsmasq.conf

www-data ALL=(ALL) NOPASSWD:/sbin/shutdown -h now

www-data ALL=(ALL) NOPASSWD:/sbin/reboot

www-data ALL=(ALL) NOPASSWD:/sbin/ip link set wlan[0-9] down

www-data ALL=(ALL) NOPASSWD:/sbin/ip link set wlan[0-9] up

www-data ALL=(ALL) NOPASSWD:/sbin/ip -s a f label wlan[0-9]

www-data ALL=(ALL) NOPASSWD:/bin/cp /etc/raspap/networking/dhcpcd.conf /etc/dhcpcd.conf

www-data ALL=(ALL) NOPASSWD:/etc/raspap/hostapd/enablelog.sh

www-data ALL=(ALL) NOPASSWD:/etc/raspap/hostapd/disablelog.sh

www-data ALL=(ALL) NOPASSWD:/etc/raspap/hostapd/servicestart.sh
修改完成之后,git clone Web 文件到 /var/www/html 路径下:
sudo rm -rf /var/www/html

sudo git clone https://github.com/billz/raspap-webgui /var/www/html
将图标资源移动到 Web 根目录。
sudo mv /var/www/html/dist/icons/* /var/www/html
修改文件的所有者为 www-data 用户。
sudo chown -R www-data:www-data /var/www/html
将 RaspAP 的配置文件移动到正确的位置。
sudo mkdir /etc/raspap

sudo mv /var/www/html/raspap.php /etc/raspap/

sudo chown -R www-data:www-data /etc/raspap
将 HostAPD 日志和服务控制脚本移动到正确的位置。
sudo mkdir /etc/raspap/hostapd

sudo mv /var/www/html/installers/*log.sh /etc/raspap/hostapd

sudo mv /var/www/html/installers/service*.sh /etc/raspap/hostapd
修改日志和服务控制脚本的拥有者和读写执行权限。
sudo chown -c root:www-data /etc/raspap/hostapd/*.sh

sudo chmod 750 /etc/raspap/hostapd/*.sh
在 /etc/rc.local 的 exit 0 之前添加下面的内容:
echo 1 > /proc/sys/net/ipv4/ip_forward #RASPAP

iptables -t nat -A POSTROUTING -j MASQUERADE #RASPAP

iptables -t nat -A POSTROUTING -s 192.168.50.0/24 ! -d 192.168.50.0/24 -j MASQUERADE #RASPAP
强制载入 /etc/rc.local 让配置生效。
sudo systemctl restart rc-local.service

sudo systemctl daemon-reload
取消对热点服务的屏蔽,并启用热点。
sudo systemctl unmask hostapd.service

sudo systemctl enable hostapd.service
将 raspap 服务移动到正确的位置并启用。
sudo mv /var/www/html/installers/raspap.service /lib/systemd/system

sudo systemctl enable raspap.service
重启树莓派,RaspAP 将自动运行!
sudo reboot
RaspAP 默认的登录用户名是 admin,默认密码是 secret。
可选服务
OpenVPN 和 TOR 作为两个附加服务,可以通过简单的设置开启。
修改 /var/www/html/includes/config.php 文件中下面的两行即可。
// Optional services, set to true to enable.

define('RASPI_OPENVPN_ENABLED', false );

define('RASPI_TORPROXY_ENABLED', false );
GitHub:https://github.com/billz/raspap-webgui/
FAQ:https://github.com/billz/raspap-webgui/wiki/FAQs


弱弱问一句,可以多拨吗
只是 AP,没有调制解调拨号功能
要不刷成openwrt试试多拨?
为什么安装好后不能登录后台
快速安装,出现这个问题,大佬知道怎么解决吗?
RaspAP Install: Updating sources
Hit:1 http://archive.raspberrypi.org/debian buster InRelease
Get:2 http://raspbian.raspberrypi.org/raspbian buster InRelease [15.0 kB]
Get:3 http://raspbian.raspberrypi.org/raspbian buster/main armhf Packages [13.0 MB]
Err:3 http://raspbian.raspberrypi.org/raspbian buster/main armhf Packages
File has unexpected size (12997660 != 12997748). Mirror sync in progress? [IP: 117.128.6.20 80]
Hashes of expected file:
– Filesize:12997748 [weak]
– SHA256:a5ee833f64325621bc4055d14b39aac3de0de15cd5069301ba641e2b10afb087
– SHA1:dfd974687629584881e4d764760e90aa5ad92b94 [weak]
– MD5Sum:5fd683e221b7e3c6ef2ba1beff8508fa [weak]
Release file created at: Tue, 15 Oct 2019 10:49:12 +0000
Fetched 15.0 kB in 4s (3,830 B/s)
Reading package lists… Done
E: Failed to fetch http://117.128.6.20/cache/raspbian.raspberrypi.org/raspbian/dists/buster/main/binary-armhf/Packages.xz?ich_args2=522-16013502044097_412fd1d5955f778df599555f982f1f6d_10001002_9c89632dd6c5f1d89239518939a83798_f1fbb194d8916536a4d7e5b1298da7bc File has unexpected size (12997660 != 12997748). Mirror sync in progress? [IP: 117.128.6.20 80]
Hashes of expected file:
– Filesize:12997748 [weak]
– SHA256:a5ee833f64325621bc4055d14b39aac3de0de15cd5069301ba641e2b10afb087
– SHA1:dfd974687629584881e4d764760e90aa5ad92b94 [weak]
– MD5Sum:5fd683e221b7e3c6ef2ba1beff8508fa [weak]
Release file created at: Tue, 15 Oct 2019 10:49:12 +0000
E: Some index files failed to download. They have been ignored, or old ones used instead.
RaspAP Install Error: Unable to update package list
找到解决方法啦。。https://github.com/billz/raspap-webgui/issues/180
On Raspbian Buster, sudo apt update –allow-releaseinfo-change allows the packages to be updated. You can then run the Quick Installer as normal.
E: 无法定位软件包 php7.1-cgi
E: 无法按照 glob ‘php7.1-cgi’ 找到任何软件包
E: 无法按照正则表达式 php7.1-cgi 找到任何软件包
换7.4(现在是)
弱弱问一句,这个怎么卸载QAQ
无法定位安装php7.1-cgi,如何解决?@Spoony
如何卸载安装的raspap,还原系统默认的配置
ubuntu mate 16.04可以替代您文中说到的系统吗?
卸载方法在FAQs里面有写到
https://github.com/billz/raspap-webgui/wiki/FAQs#how-do-i-remove-raspap
在终端里面运行下面这两段代码就行
cd /var/www/html
sudo installers/uninstall.sh